Configuring postback for Voluum
In order to set up Postback with Voluum, the following steps are required:
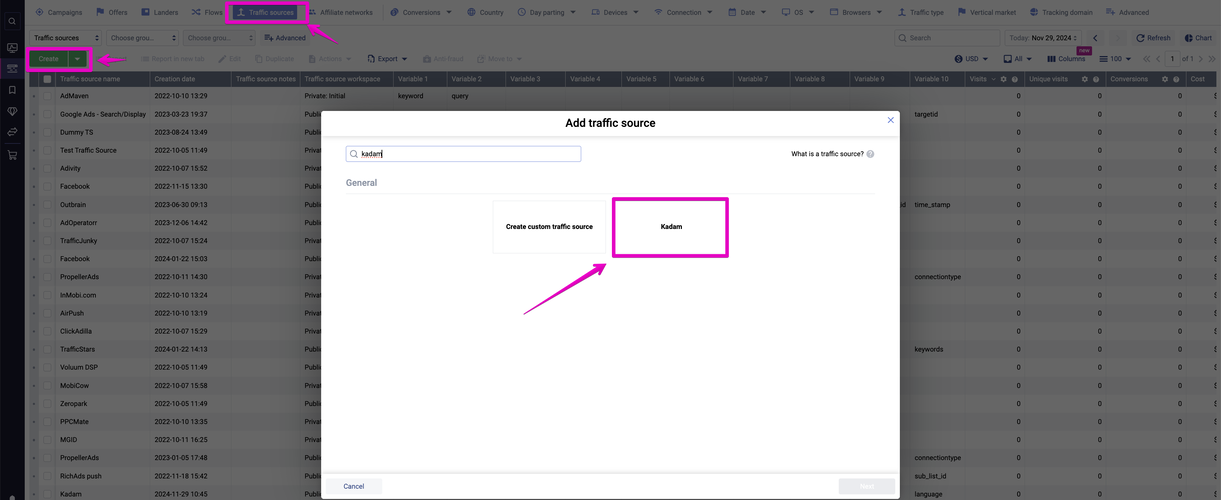
1. Go to the ‘Traffic Sources’ section and select Kadam when creating the template.
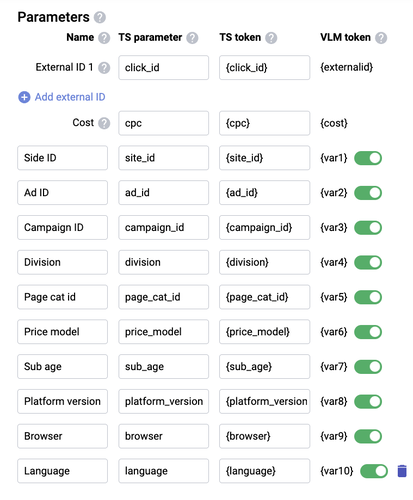
2. The template is created automatically and pulls up the parameters:
3. The postback URL is automatically prescribed and looks like this::
https://kdtrk.net/ru/postback/?data={externalid}
4. Save the template.
5. Go to Campaigns and create a campaign and use the saved template for Kadam.
According to the campaign URL from Voluum to be submitted to Kadam for the corresponding campaign as the URL a ready link is obtained which looks like:
https://VOLUUM_TRACKING_DOMAIN.com/VOLUUM_CAMPAIGN_ID?site_id={site_id}&ad_id={ad_id}&campaign_id={campaign_id}&division={division}&page_cat_id={page_cat_id}&price_model={price_model}&sub_age={sub_age}&platform_version={platform_version}&browser={browser}&language={language}&cpc={cpc}&click_id={click_id}
6.Save the finished link.
7. Next, go to the Kadam personal cabinet and create a new campaign. In the "Campaign URL" field, paste the copied link with the click_id parameter
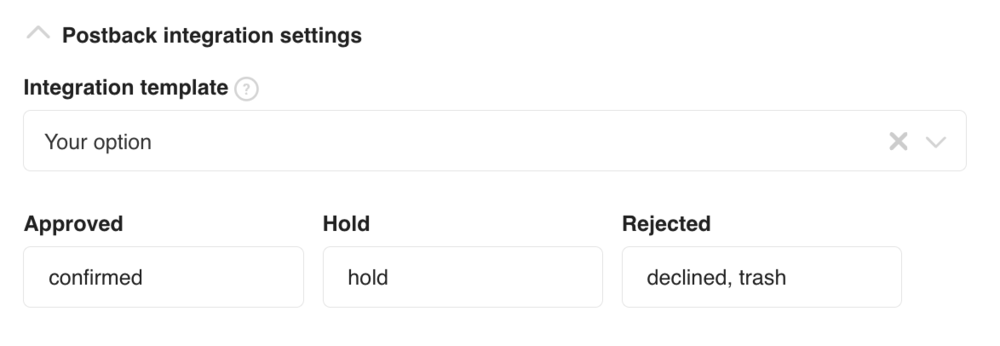
You will also need to select in "Postback integration settings" – "Integration template" the "Your option" acceptance pattern:
set the field Approved to confirmed
to Hold - hold
for the field Rejected - declined, trash
After all the settings, it is definitely recommended that before launching the campaign, do a test conversion strictly according to instructions


