Configuring postback for Clickdealer.com
In order to set up Postback from clickdealer.com, you need to follow these steps:
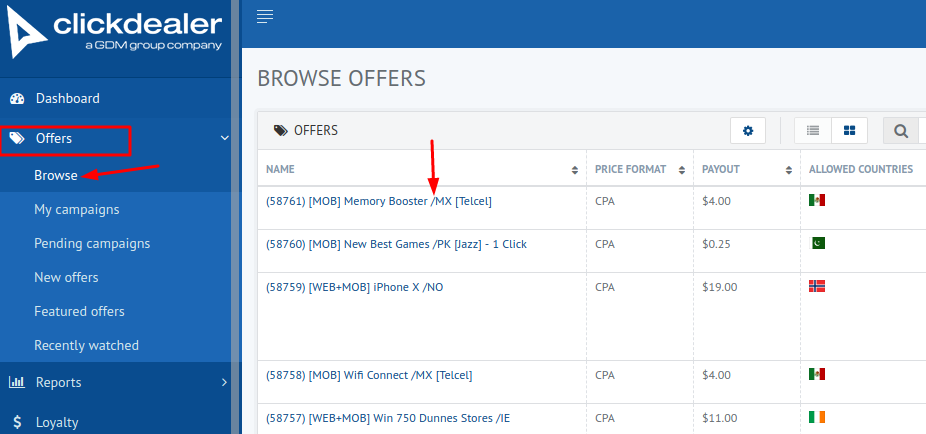
1. In the main menu bar select "Offers" and "Browse". From the list of offers click on the desired one.
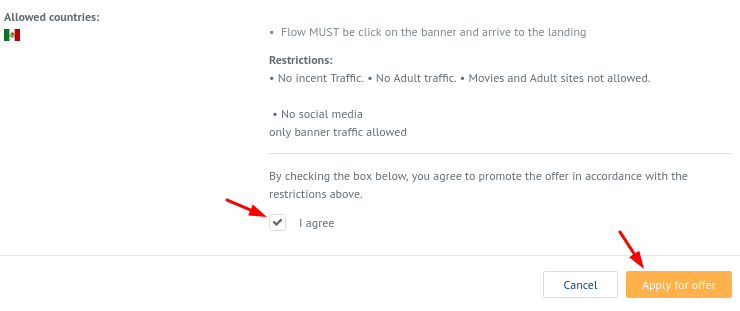
2. Check the "I agree" box in the offerer and click the "Apply for offer" button
3. After the offer has been approved by the platform, go to the "Offers" and "My campaigns" menu. Click the pencil icon next to the offer.
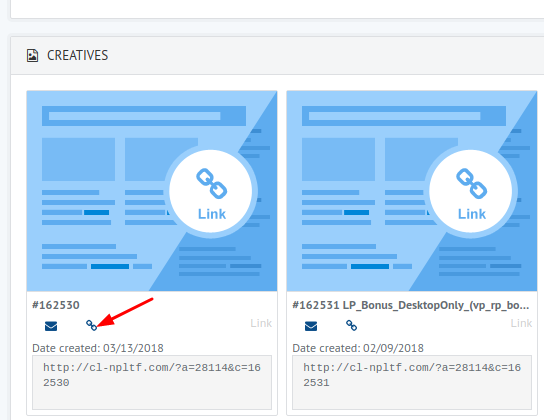
4. We select the desired landing page in the description and click on the link icon
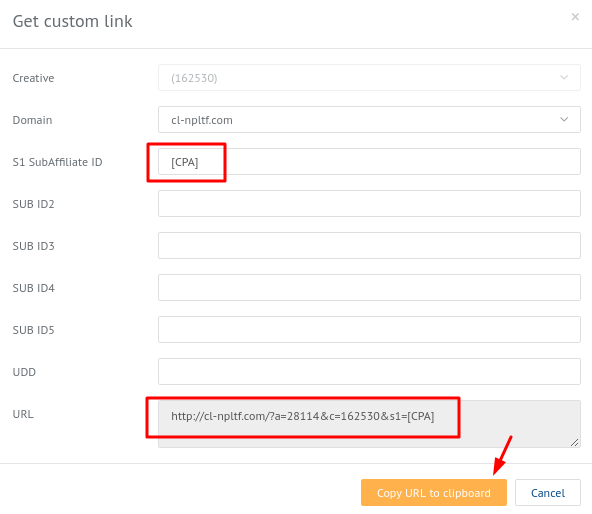
5. Add the {click_id} parameter to the "S1 SubAffiliate ID" field and copy the link by clicking the button. Note: For the example, the s1 field is selected to specify the {click_id} label and postback setting, but in the np it is recommended to specify the label in the sub id2 field.
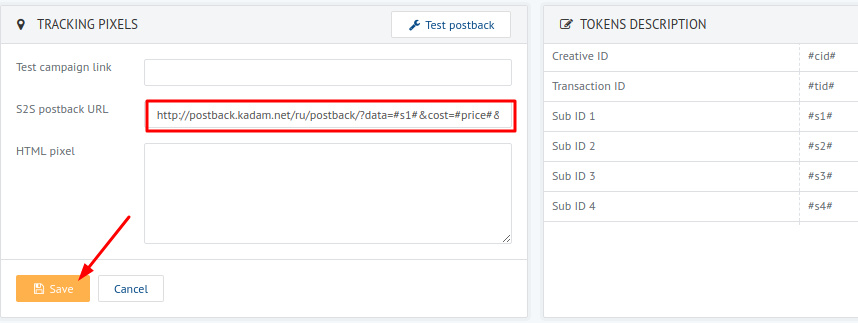
6. After that, at the bottom of the description in the "S2S postback URL" field, type the postback link:
https://kdtrk.net/ru/postback/?data={s1}&cost={price}¤cy=USD
Note: If the label is specified in the sub id2 field, we specify s2 instead of s1 in the reference.
ATTENTION!!!! This postback will work as a notification of confirmed conversions only. Therefore, by specifying such a postback, depending on the offer, the status of confirmed conversions will also be received for those events that will not be paid in the affiliate network (for example, depending on each offer it may be registrations, unconfirmed requests, etc.). Therefore, clarify the specifics of notifications about events in each selected offer in advance and discuss solutions with the support of the affiliate network.
After specifying the postback, click the "Save" button
7. Paste the received link with the {click_id} parameter into the URL field in the advertising campaign in the Kadam cabinet.
An example of a finished link: http://cl-npltf.com/?a=XXXXX&c=XXXXXX&s1={click_id}
Acceptance pattern select do not need!
