Configuring postback for Adcombo.com
To set up a postback with adcombo.com, follow these steps:
1. Select the "Postbacks" menu on the left side of the page and click on the "Settings" tab. We need to add 3 postbacks for each lead status. Fill in the first 3 fields as follows:
Postback URL for leads - https://kdtrk.net/ru/postback/?data={subacc}&status=approved
Postback URL for holds - https://kdtrk.net/ru/postback/?data={subacc}&status=hold
Postback url for rejects - https://kdtrk.net/ru/postback/?data={subacc}&status=reject
Then, check the box "I want to use only global postbacks" to avoid setting up postback links for each flow per offer. Save the changes by clicking the "Save" button.
2. Go to the "Offers" menu. Choose the desired offer from the list and click on its name.
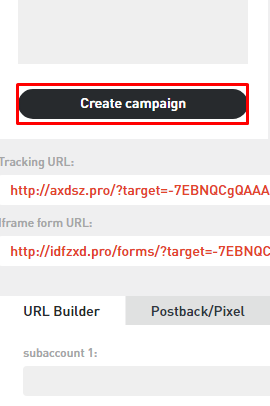
3. In the offer description, you will find the "Create Campaign" button. Click on it.
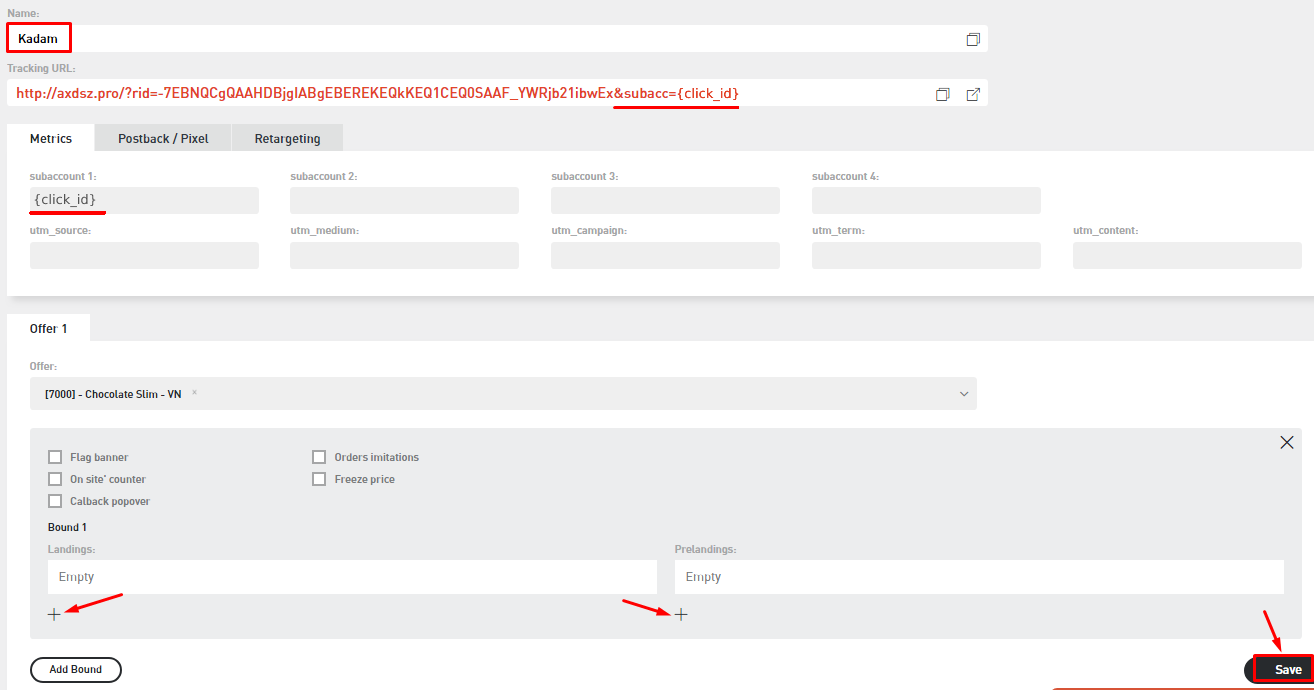
4. Enter a name for the campaign in the "Name:" field. In the subaccount 1 field, make sure to include the label {click_id}. Choose the landing page and pre-landing page by clicking the "+" button at the bottom. After configuring all the settings, click the "Save" button.
5. Copy the promoted link from the campaign.
6. Paste the copied link into the "Campaign URL" field in the Kadam system when creating a campaign. Example of the completed link: http://axdsz.pro/?rid=XXXXXXXXXXXXXXXXXXXXXXXXXXXXXXXXXXX&subacc={click_id}
.
There is no need to select anything in the "Acceptance Template" field.


