Instructions for integration with Adspyglass
From Service Manual Kadam.net
Link network
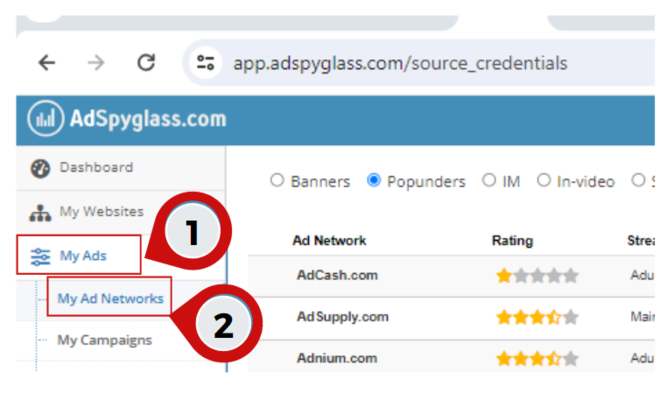
In your http://adspyglass.com cabinet, go to My Ads section, My Ad Networks subsection
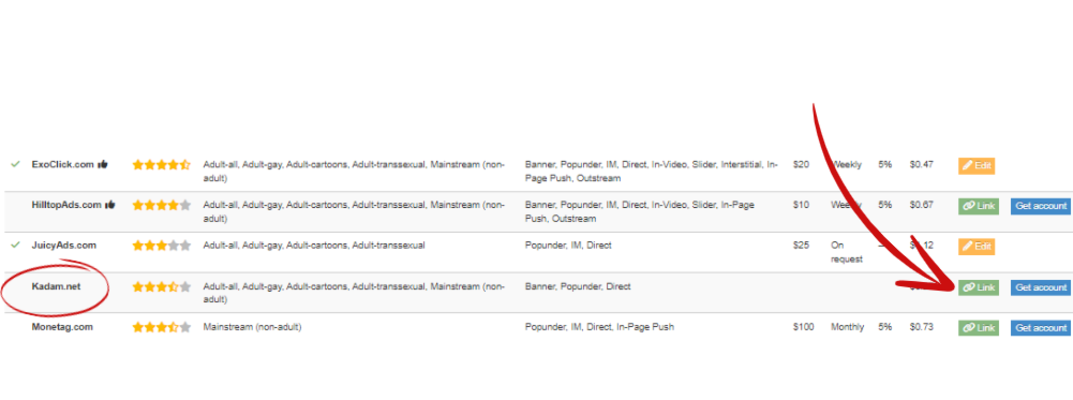
Select Kadam from the list and click the Link button
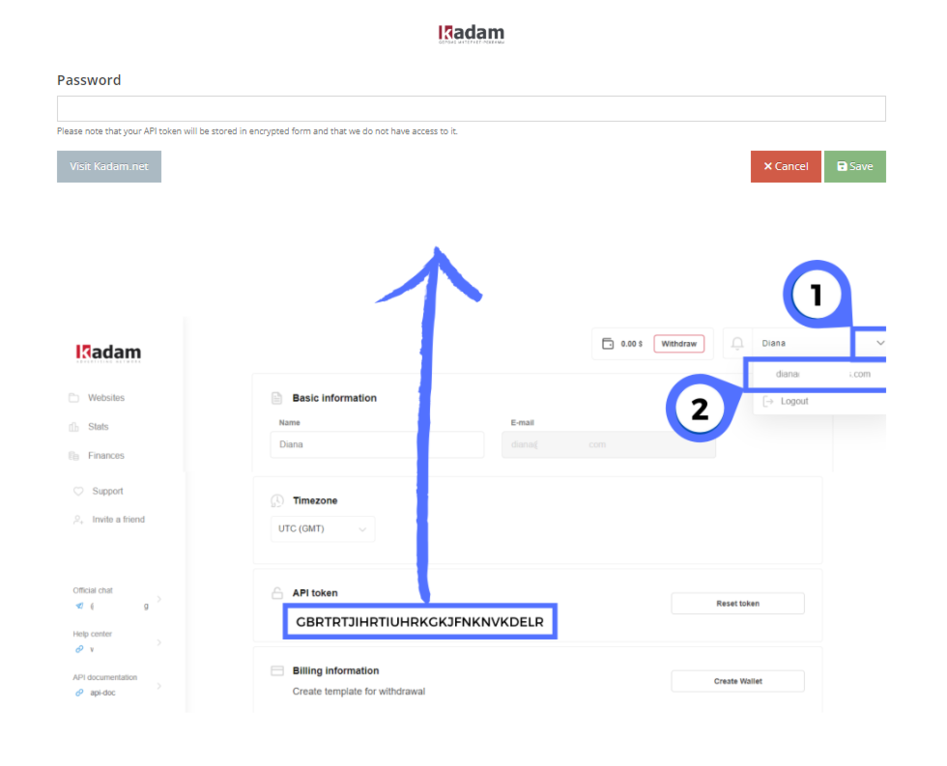
Insert the Api key from your Kadam Dashbord and press Save button
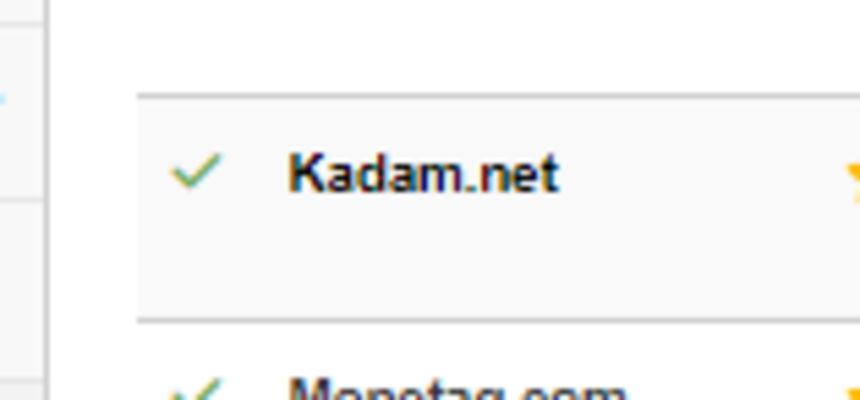
A green tick next to the name will confirm that the network has been successfully linked in
Implements Creative
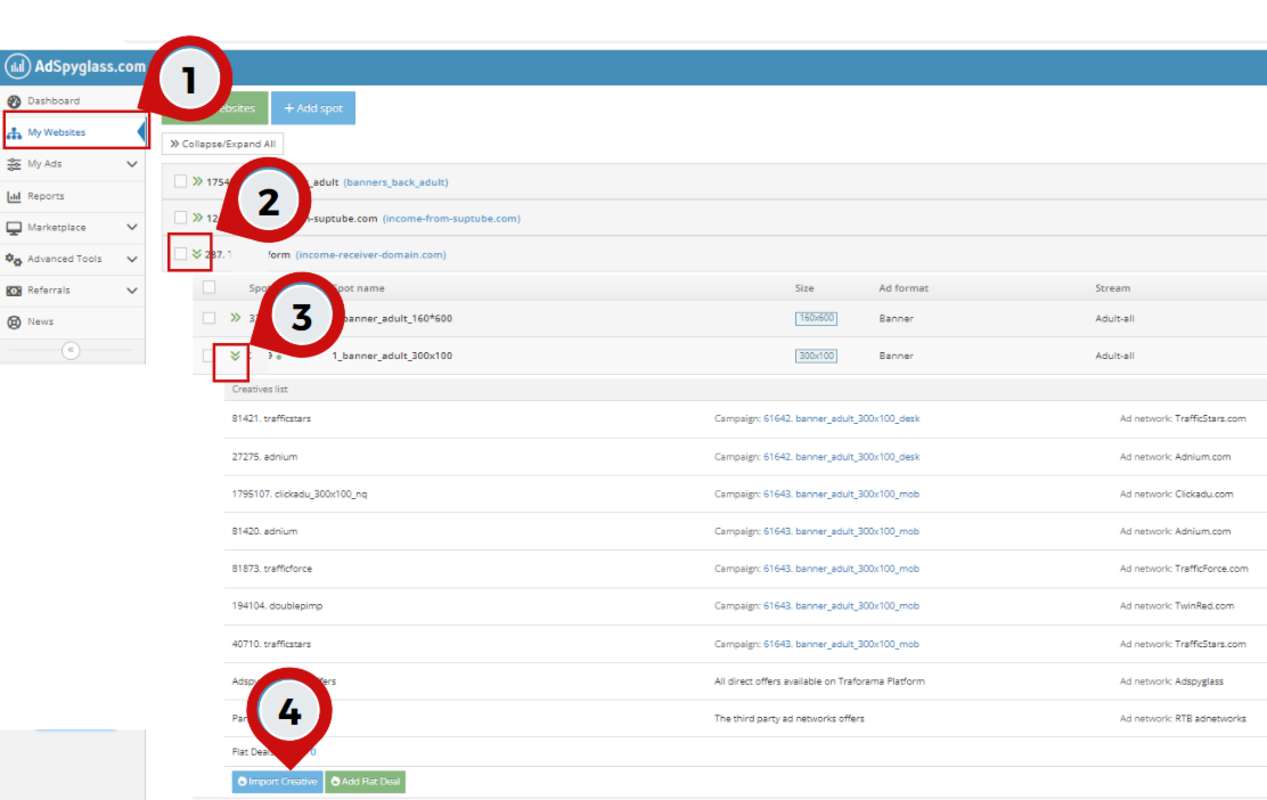
Go to the My Websites section, select the domain and spot in the rotation of which you would like to add Kadam's creative. Click the Import Creative button
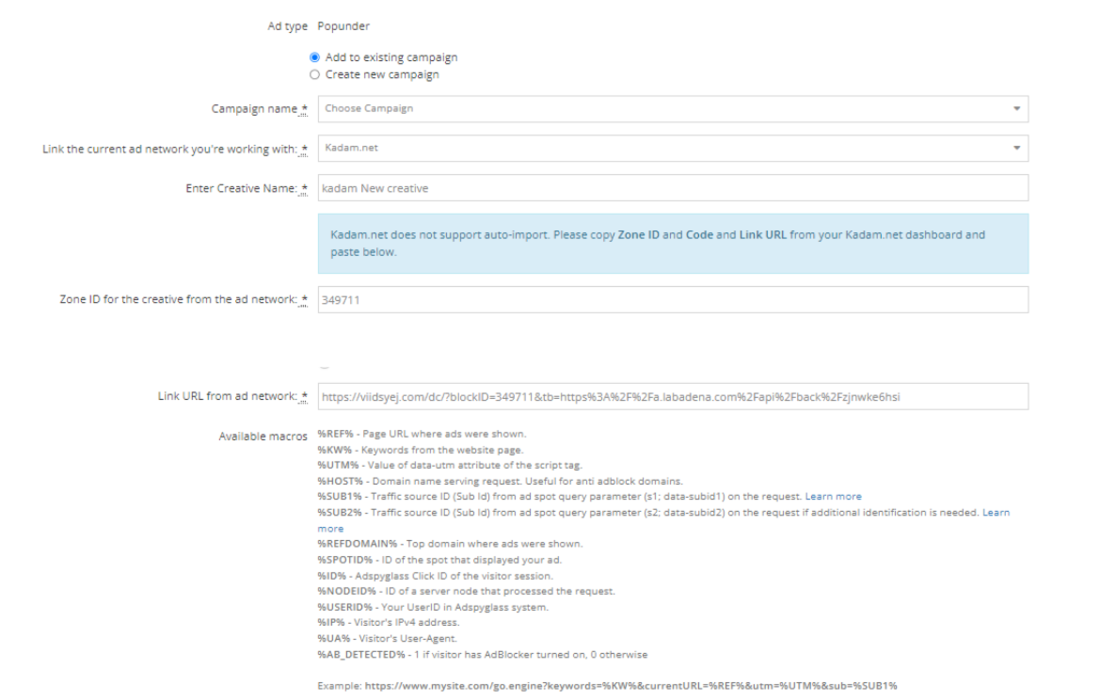
You will be presented with a creative creation window
- Select a current campaign, or create a new one for this creative
- Select the Kadam network from the list of networks
- Specify the name of the creative
- Specify the zone id
- Paste the zone URL from your office in the Kadam network
