Difference between revisions of "Configuring postback for Vlk.partners"
(Created page with "In order to configure Postback with Vlk.partners, the following steps are required: 1. Choose menu "Promo" - "Postback" and click the "Add" button file:Vlkpartpost1.png|cen...") |
(No difference)
|
Latest revision as of 12:20, 27 December 2023
In order to configure Postback with Vlk.partners, the following steps are required:
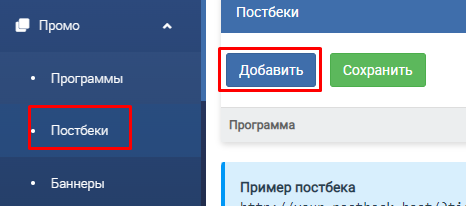
1. Choose menu "Promo" - "Postback" and click the "Add" button
2. You need to add at least one postback for the right targeted action that will be paid to receive a notification of a confirmed conversion.
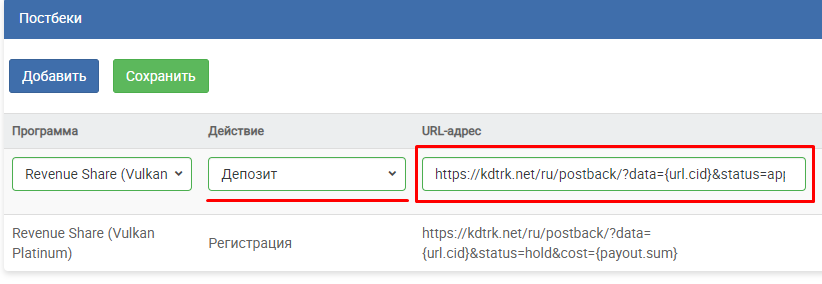
You can add postbacks for different actions and set the required status to be sent to our statistics. By example, let's consider adding a postback for registration notification with the status "in progress" and deposit with the status "OK".
Add the first postback for registration of this kind:
https://kdtrk.net/ru/postback/?data={url.cid}&status=hold&cost={payout.sum}
Also select the desired offer and the desired action (in our case "registration")
For the deposit we add a postback of the following type:
https://kdtrk.net/ru/postback/?data={url.cid}&status=approved&cost={payout.sum}
The end result will be the addition of 2 postback.
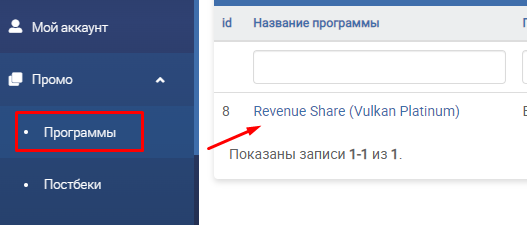
3. Choose an offerer from the list of programs in the menu "Promo" - "Programs" and click on the name of the offer.
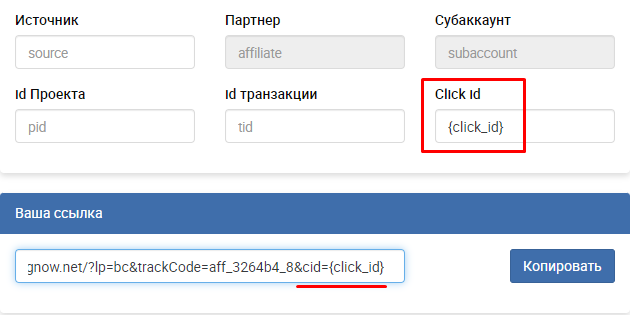
4. Select the landing page and be sure to enter the label {click_id} in the 'Click id field.
5. Copy the advertised link with tags and paste it into the "Campaign URL" field in the Kadam system in the campaign creation menu.
Example of a ready-made link : https://XXXXXXXXXXXX.net/?lp=bc&trackCode=aff_XXXXXX_8&cid={click_id}
You do not need to select anything in the "Acceptance Template" field.


